Data Recovery Guide for Windows

Introduction

Welcome

data-recovery-windows-guide


Welcome to the user manual for VirtualLab Client for Windows, the most powerful and successful remote data recovery software available. VirtualLab, the culmination of more than 15 years of experience in the data-recovery business, provides a whole suite of tools for recovering lost data, analyzing the data to determine its quality and saving it to a storage device of your choosing (you can even save via FTP your recovered data!)

When you perform a recovery session using VirtualLab, we can almost guarantee that you will recover the files you have lost. You don’t even have to pay for our software unless you have used its free scanning and data-analysis capabilities to determine it will work for you. It’s like having an experienced data-recovery technician in your own home or business!

1

0

Back To Top

How To Use This Manual

We suggest that you read this manual from beginning to end before you install and use VirtualLab. Inside you’ll find a wealth of information about the application and the data-recovery process. Although you more experienced users out there will be tempted to skip a section or two, we feel that everyone will benefit from at least one complete reading. And besides, our writers will sleep more comfortably knowing their efforts haven’t gone unnoticed.

Here’s an overview of each major section of the manual:

Introduction

The Introduction (that’s what you’re reading right now) welcomes you to the large, happy and ever-growing family of VirtualLab users. In this section, we explain how our ground breaking software works, list the types of systems with which it is compatible, define some data-recovery lingo and unveil the single most important rule of data recovery.

Getting Started

Here’s where we tell you how to install and uninstall VirtualLab Client. If the application is already installed on your computer, you should uninstall it before you install the new version.

Recovering Lost Data

This section is the nucleus of the manual. Here we guide you step by step through the data-recovery process. When you begin a new recovery session, start with “Pre-Recovery Checklist,” and follow each instruction in each topic until you reach the end of “About Quota,” at which point your data recovery should be a success! If for some rare and strange reason the recovery didn’t go as planned, you probably can find the solution to your problem in the FAQs and Troubleshooting section.

FAQs and Troubleshooting

As we said earlier, we’ve been in this business for a very long time. Over the years, we’ve fielded so many questions from customers that they would fill several volumes. We did manage to compile a list of the questions we see most often, and we’ve listed them here, along with the answers, in the FAQs and Troubleshooting section. What is an FAQ? That’s short for “frequently asked question.” Our FAQs will help you solve problems you may be experiencing and also just give you a little extra information about VirtualLab that’s good to know.

Upgrading VirtualLab

This short little section tells you how to keep your VirtualLab software up to date.

Need Further Assistance?

What if you’ve read this manual from cover to cover and followed every instruction, and you’re still experiencing problems? Just check out the Need Further Assistance? section for details on how to contact the folks at BinaryBiz. We kindly ask that you please refer to this manual one last time before contacting us (our technicians are super busy!) to see if the answer to your problem can be found within.

0

0

Back To Top

Important Terms

As you use VirtualLab and read this user manual, you’ll come across terms with which you may not be familiar. To keep you from having to pull out your dictionary, we’ve compiled the following list of definitions:

HDD

Short for “Hard Disk Drive,” an HDD helps manage the transfer of data to and from your computer’s hard disk. Because these two items always come as a single unit, “hard disk drive” and “hard disk” are usually used to refer to the same thing.

Bad Device

This is the storage device that contains the data you want to recover. A Bad Device can be any disk-like storage media, such as your computer’s hard drive, an external HDD, Flash card or any other form of removable media.

Good Device

This is a storage device that is in perfect working order onto which you want VirtualLab to save the data recovered from the Bad Device. The Good Device may be located on the computer on which you’ve installed VirtualLab (the “host” computer) or on any other computer accessible from the host via a network connection. The Good Device can be any of the storage media listed for the Bad Device. The Good Device is used to save recovered from the Bad Device data to.

Host Computer

This is the computer on which you have installed VirtualLab Client. The Host Computer is used to recover the lost data from the Bad Device, which should be connected to the Host Computer as an additional drive (second, third or fourth – in addition to the existing drive(s) on the Host Computer). This means that the Host Computer will have at least two disks:
· Bootable HDD, which is used to boot Windows from;
· The Bad Device set as an additional drive.

If you are using removable media such as a Zip disk or Flash card, you should insert the device prior to launching VirtualLab Client.

Client/Server

Client/server describes a method of networking computers in which one or more computers (clients) make resource and service requests to a server, which in turn provides resources and instructions for the clients. For more information, see How Does VirtualLab Work?

FAT

Short for “File Allocation Table”, a FAT is a table stored on your storage device that tells the computer where to look when it needs to find a file stored on this device. When you save data, it is stored in chunks of information called “clusters”. The clusters for a single file may actually be located in several different areas of your storage media. The FAT is your computer’s way of recording the locations of those clusters for each file you save. The term FAT is often used to refer the file systems which use File Allocation Tables – FAT12, FAT16, FAT32.

NTFS

Short for “NT file system,” this is basically the Windows NT equivalent of the FAT described above.

Partition

A partition is a logical division of a hard disk that creates the impression that you have more than one hard disk. Say you want to run two different operating systems on the same hard disk. You would create a two-partition drive when you format the disk. Partitioning a disk is just a way to divide it up into independent sections.

0

0

Back To Top

What is VirtualLab?

VirtualLab is a complex data recovery client developed for non-destructive data recovery from hard disk drives and other storage devices via an encrypted connection over the Internet to the VirtualLab Server. It may sound complicated at first, but after reading this manual and using VirtualLab, you’ll see that despite the complexity of the software, it’s still very easy to use. Here’s a little bit about the software:

VirtualLab can recover folders and files that were lost because of the following:

  • Intentional (trashed files) or unintentional deletion
  • Viruses
  • Formatting of a disk
  • FDISK or any other disk-partitioning tool
  • All other non-physical data loss problems

VirtualLab can recover files and folders from disks on which the following components have become corrupted (or even if they are completely missing):

  • Partition table (main or extended)
  • Boot record (sometimes called the “BIOS Parameter Block” or BPB)
  • File allocation table (both FAT1 and FAT2 on file systems that use FAT12, FAT16 and FAT32)
  • Root folder
  • Master file table

When VirtualLab recovers your data, you have the options of saving it to another hard drive, a network drive, an FTP location, a floppy disk or some other type of storage device.

0

0

Back To Top

How Does VirtualLab Work?

VirtualLab is modeled on a networking technology called “client/server.” In a client/server network, a server acts as the master to one or more client machines. The server typically serves as a central repository for files and applications that the clients may access by connecting to the server via a network connection. The server acts as the “brain” of the network by managing the transfer of information and sending instructions to the clients.

In keeping with this client/server model, we have designed VirtualLab to include two closely interacting applications: VirtualLab Server and VirtualLab Client.

VirtualLab Server

VirtualLab Server, physically located at the BinaryBiz facility, is the brain of the data-recovery process. This portion of the system uses sophisticated and innovative algorithms to remotely analyze a Bad Device and build a virtual file system on the Host Computer that mirrors that of the Bad Device. These routines are the culmination of more than 15 years of human experience in the data-recovery field at Total Recall. During that time, we’ve seen just about every data-loss scenario imaginable, and we’ve enjoyed thousands of successful data recoveries in the Total Recall lab’s “clean room” facility. In essence, we’ve distilled the experience and knowledge of the Total Recall technicians into the artificial intelligence at work in the VirtualLab Server.

VirtualLab Client

VirtualLab Client is the application you must download and run on the Host Computer. Much of what it does is governed by commands it receives from VirtualLab Server. VirtualLab Client is responsible for gathering data from the Bad Device and sending compressed and encrypted information about that data to VirtualLab Server. VirtualLab Client then builds a virtual file system on the Host Computer based on the analysis results it receives from VirtualLab Server. Once the virtual file system is complete, VirtualLab Client allows you to select which “lost” folders and files you want to save to the Good Device.

No data files or any other personal information is sent to, or stored by, VirtualLab Server (we’re big privacy advocates here at BinaryBiz).

0

0

Back To Top

System Requirements

VirtualLab works on all Windows-based computers with an Internet connection. A Mac version of VirtualLab is also available on the BinaryBiz Web site. Following are detailed minimum system requirements for the Host Computer:

Operating Systems

Windows 95, 95 OSR2, 98, ME, NT, 2000 and XP

Memory (RAM)

At least 32 megabytes (the more the better)

Available Space on the Good Device

Enough space to save the recovered data; for example, if you expect to recover 40 MB of lost data, the Good Device should have at least 40 MB of free space (and even more if you plan on using the Host Computer as the Good Device).

Internet Connection Speed

28.8 Kbps or faster

0

0

Back To Top

Supported File Systems and Storage Media

Supported Storage Media

VirtualLab can be used to recover data from the following types of devices:

  • IDE HDD
  • SCSI HDD
  • RAID volumes
  • Dynamic drives
  • Floppy drive
  • Zip/Jaz drive
  • Compact Flash cards and other disk-like media that use a FAT/NTFS file system to store files and folders.
  • CD-RW disks (VirtualLab can recover data from CD-RW disk if Host Computer is equipped with CD-RW burner)
  • DVD-RW disks (VirtualLab can recover data from DVD-RW disks if Host Computer is equipped with DVD-RW burner)
  • DVD+RW disks (VirtualLab can recover data from DVD-RW disks if Host Computer is equipped with DVD+RW burner)

Supported File Systems

VirtualLab supports the following file systems:

  • FAT12 (used by DOS and Windows on floppy disks and some small-sized media like Compact Flash cards for digital cameras)
  • (used by DOS and Windows for partitions less than 2 gigabytes in size)
  • FAT 32 (used by Windows for bigger partitions)
  • NTFS (used by Windows NT, Windows 2000 and Windows XP)
  • ISO 9660 (used with CD/DVD)

0

0

Back To Top

URGENT – Read This Before Using VirtualLab

Before you use VirtualLab to recover lost data, you must keep in mind a very important rule:

DO NOT MAKE ANY CHANGES TO THE DISK ON WHICH THE LOST DATA IS LOCATED (the Bad Device).

The success of your data recovery depends largely on your adherence to this crucial rule. When we say to make no changes to the damaged disk, we mean that you basically should leave the disk alone. This includes the following:

  • Do not try to delete folders or files from the Bad Device, even if you are able to see them and think that they are not damaged.
  • Do not try to save anything to the Bad Device.
  • Do not attempt to format or re-partition the Bad Device, not even with a program like fdisk or format. If the support people for these or any other applications tell you it’s OK to format or re-partition the Bad Device, do not listen to them.

You risk permanent data loss if you do not heed these warnings. If you already have made one of these mistakes, don’t worry. Just don’t make any more changes to the Bad Device. You can use VirtualLab Client for free to see if your data is still recoverable. And even if VirtualLab can’t detect your Bad Device, all is not lost. If your Bad Device is HDD, which is not detectable by computer’s BIOS, try our unique remote HDD repair service at BinaryBiz iDriveRepair.

A professional data recovery service such as Total Recall still may be able to help, if all other attempts faulted. To get a quote for an in-lab data recovery, please visit the Total Recall team at the Total Recall Data Recovery Web site.

0

0

Back To Top

Getting Started

Pre-Installation Checklist

Before you install VirtualLab Client on the Host Computer, it’s very important that you complete the following five items on the following checklist:

  1. First of all, do not install VirtualLab on the Bad Device. Remember the golden rule of data recovery: never change anything on the Bad Device!
  2. Make sure you have enough memory on the Host Computer for VirtualLab Client. The application requires only about three megabytes of space, but we recommend as much as 56mb of free RAM (depending on how much data and how large a drive is being recovered).
  3. Make sure you have enough free space on your Good Device. You need space for more than just your lost data. Here’s a list of everything that may need to be saved to the Good Device before and during a recovery session:
    • The lost data. You should plan on recovering at least as much as was lost on the Bad Device. And you may need even more free space than what was lost because VirtualLab may recover files and folders you intentionally deleted in the past. If you decide to recover all recovered folders and files, you will have more files than what you used to ‘see’ before the failure/data loss.
    • VirtualLab Client application. If you are using a single computer as the Host Computer and the Good Device (that is, you plan to save your lost data to the same computer on which you have installed VirtualLab Client), you must have enough room for the application itself. It takes up only a few megabytes of space, so it probably won’t create any memory issues. Regardless, it never hurts to consider those few megabytes when checking your available memory.
    • Temporary files created by VirtualLab and files that track your session progress. During a recovery session, VirtualLab creates temporary working files on the Good Device. These files could take up hundreds of megabytes of space, again depending on the size of the device and amount of lost data found.

    If you want to save just a small amount of data, you can use a floppy disk as the destination drive; otherwise, you need to use a local or network drive. If you don’t have enough free space, you may want to switch to a Host Computer or Good Device with more free space.

  4. Close all other applications to improve performance during installation. Although not necessary, this is highly recommended.
  5. VirtualLab does not allow you to save recovered data to the device you are recovering the data from. Doing so could overwrite the very data you are trying to recover! Therefore, you must make sure you have a master/slave hard drive configuration that isolates the Bad Device from the Good Device. If you’re not sure how to create a master/slave setup on your Host Computer, there is an excellent article with detailed instructions on how to do so here.

0

0

Back To Top

Installation

Follow these steps to install VirtualLab Client on the Host Computer:

1. Make sure the Host Computer meets all of the system requirements and that the Host Computer and Good Device have sufficient memory available, as defined in the pre-installation checklist.

2. If you haven’t done so already, install the Bad Device as an additional device to the Host Computer. If you need assistance, read this article. It’s important that you use this page as an installation reference only. You can also contact the drive manufacturer for assistance with installing their driveas a slave (secondary) device. Be sure that the primary drive is loading Windows and can connect to the internet.

3. Download VirtualLab Client if you have not already done so.

4. Extract the VirtualLab.zip file using a file-compression utility such as WinZip, PKZip or WinRAR. If you already have one of these utilities, it will launch automatically when you double-click the VirtualLab.zip file. If you don’t have a file-compression utility, you must download one from the Internet.

download
VirtualLab Client Installer

5. If you are upgrading from a previous installation, uninstall the older version of VirtualLab Client first.

6. Double-click the VirtualLab Client Installer.
A dialog box with a progress bar will indicate that the application is preparing to install. This should take only a few moments.

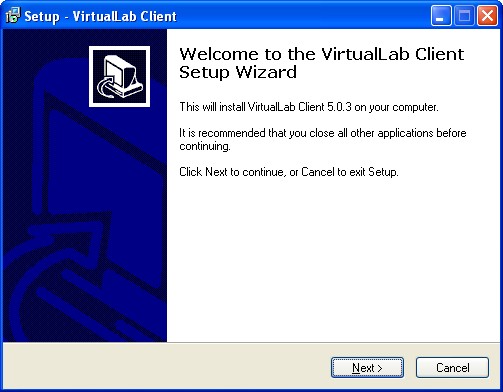
7. Click Next in the VirtualLab Client Setup Wizard that appears next:
setup01

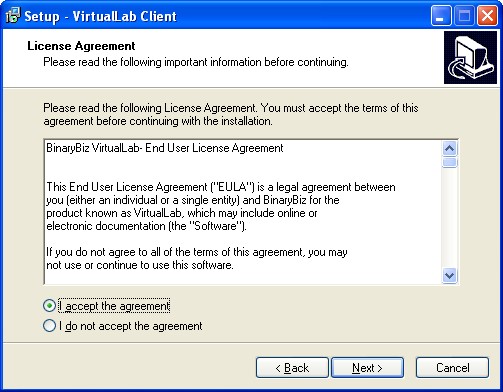
8. Read the license agreement, set radio button to “I accept the agreement” position and click “Next”. If you click Decline, the installation will end, and you will need to uninstall VirtualLab Client.
setup02lic

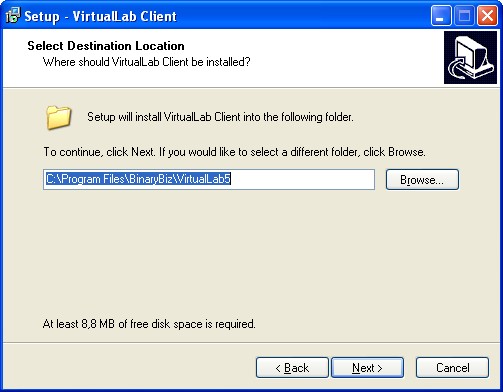
9. Select a folder in which to install VirtualLab Client. The default selection is your Programs folder. Since this is the best place in which to install the application, we recommend you just click Next (just be sure you don’t install VirtualLab Client on the Bad Device).
setup03path

10. You will be prompted to create a desktop icon on next step:
setup04icon

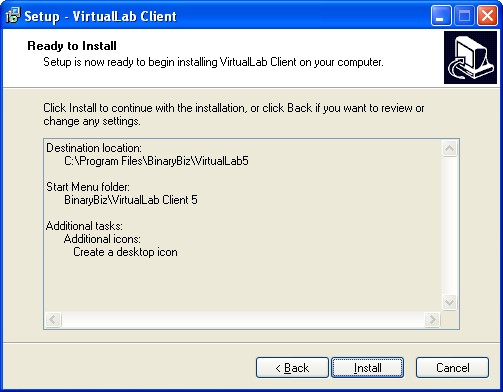
11. Check all settings and press the “Install” button:
setup05review

12. A progress meter will appear to let you know that VirtualLab Client is being installed in the selected folder on the Host Computer.
setup06progress

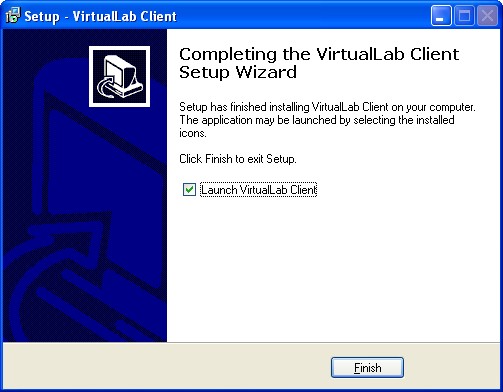
13. In a few seconds, you’ll get a message informing you that the installation was a success!
clip0080

14. If you’d like to immediately begin using VirtualLab Client, select the “Launch VirtualLab Client” checkbox and click “Finish”.

0

0

Back To Top

Uninstalling VirtualLab

If VirtualLab Client is already installed on your computer, you must uninstall your old version before installing a new one. Here’s how to do so:

1. Make sure that VirtualLab Client is not running.

2. On the Windows Start menu, go to

Start > Programs > BinaryBiz > VirtualLab Client 5> Uninstall VirtualLab Client.

3. Click Yes to confirm the uninstall. VirtualLab Client will be completely removed from your computer

Do not delete a workspace from a paid session until you are completely finished with it!

0

0

Back To Top

Recovering Lost Data

Pre-Recovery Checklist

Before you begin a recovery session, you should make sure you’ve addressed every item on this checklist. You should have already taken care of some of these before you installed VirtualLab Client, but it never hurts to check twice. After all, your data is at stake here!

checkmarkRemember the golden rule of data recovery: never change anything on the Bad Device! (We know you’re sick of hearing it at this point, but believe us, it’s for your own good)

checkmarkCheck that you have enough free space on the Good Device. Remember, you may need more free space than the amount that was used by your lost data. If you don’t have enough free space, you may need to use a different Good Device. You should review the pre-installation checklist for more detail about what you should consider when checking your available memory.

checkmarkCreate an empty folder on the Good Device which you will use for saving temporary files and files that contain information related to the progress of your recovery session. When you begin a recovery session, VirtualLab will ask you to tell it where that folder is located. Again, make sure the Good Device has enough free memory to store these files, which could take up as much as 100 megabytes (or more, depending on the size, type and amount of data found on the Bad Device).

checkmarkClose all other applications. This will ensure that system resources won’t be diverted to other programs during the recovery session.

0

0

Back To Top

Launching VirtualLab

If you didn’t launch VirtualLab Client immediately after installing it, you can also launch the application by going to:

Start > Programs > BinaryBiz > VirtualLab Client > VirtualLab Client.

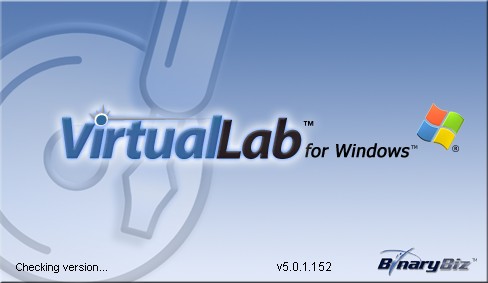
After you have launched the VirtualLab Client a splash screen will appear for a couple of seconds:
splash-check

VirtualLab will check if new version is available, and will offer you to download new version
if it was found:
new-version

Do not ignore this offer! Download new version by pressing “Yes”.

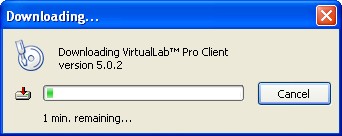
After this you’ll see small window with downloading progress bar:
dowload02

Wait a little until new version is downloaded.
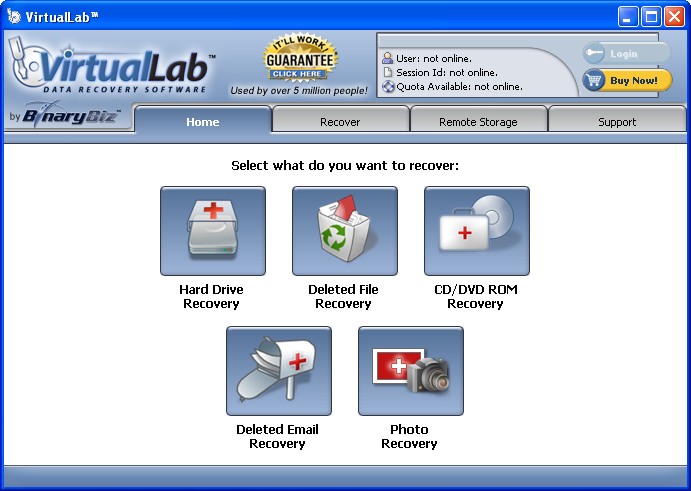
Then it will be installed automatically, and after this you’ll see main VirtualLab window.
main-window01

Now, you have to choose which kind of recovery you need.
Just press “Hard Drive Recovery“, or “Deleted File Recovery“, or “CD/DVD Recovery“, or “Deleted Email Recovery“, or “Photo Recovery

Choose “Deleted File Recovery” if you want to recover files that were intentionally (or accidentally) deleted.
If you’ve lost data after computer crash, virus/malware activity or formatting Bad Drive, you should choose “Hard Drive Recovery“.

You can go back to this choice at any time later – just click “Home” tab in upper part of the main VirtualLab window.

0

0

Back To Top

Hard Drive Recovery

This module is designed for data recovery from HDDs with crashed file system. Formatted drives, drives with failed operation/file system, drives suffered from virus/malware activity should be recovered here.
If, on the other hand, you want to recover deleted files, you have to choose “Deleted File Recovery“.

First of all, you see list of physical deviced attached to Host Computer:
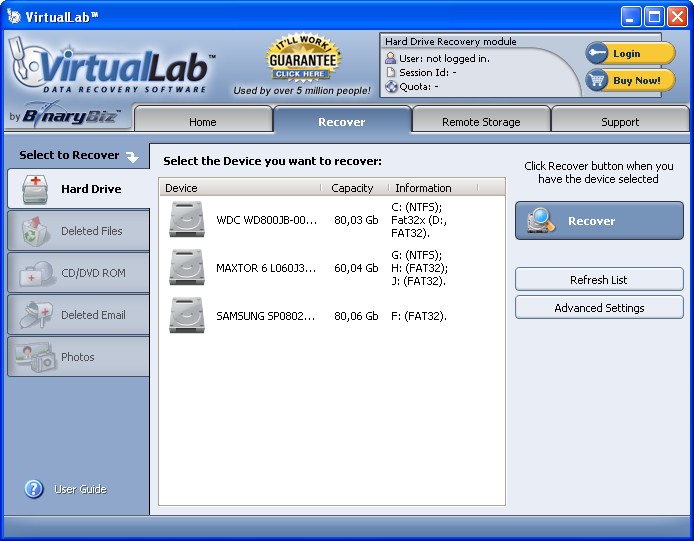
hdrec01start
If you do not see your Bad Device here, your HDD most probably has some problems on physical level.
If your HDD is not detected by copmuter’s BIOS Setup, you have to try BinaryBiz iDriveRepair – our unique remote service which can repair HDDs with errors on the firmware level just over Internet.

Now, select your Bad Device from the list of HDDs and press “Recover” button (if you are familiar with file system details, you can change “Advansed Settings” before pressing the “Recover” button).
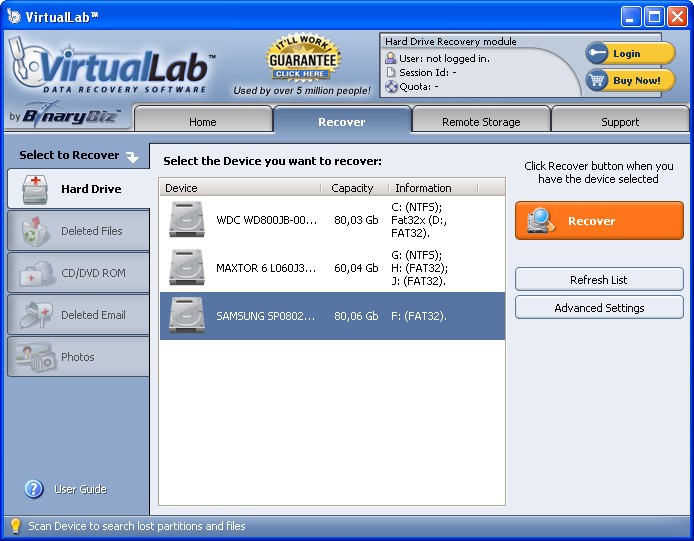
hdrec02select

VirtualLab will now look for lost partitions, it could take a few minutes depending on the size of HDD.
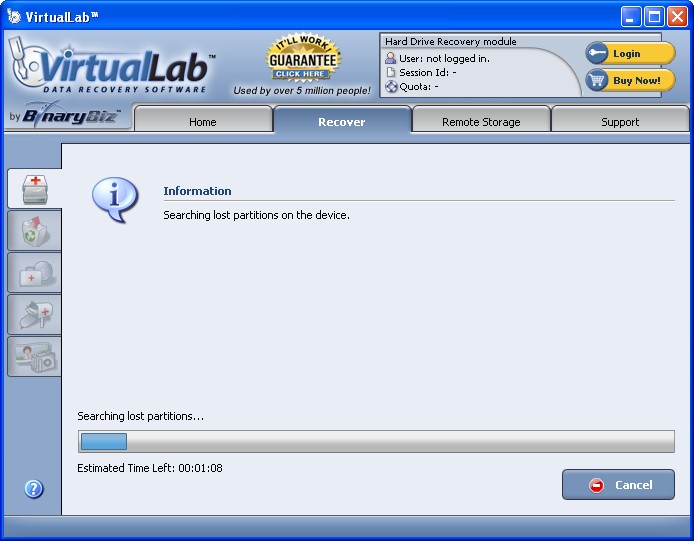
hdrec03searchpart

Then, full sector-by-sector scanning will be performed
On this step, VirtualLab begins to perform a thorough scan of the drive. Depending on the size of the disk, this could take quite a while. Below the progress bar, you’ll see the estimated time remaining in the scan.

exclTIP: If the scan time increases, and does not decrease, significantly, then the drive you are scanning may have read errors, indicating a drive that is physically bad. Scanning a physically damaged drive is not recommended.

You will see the graphical map of the drive updated dynamically, as soon as new objects are found:
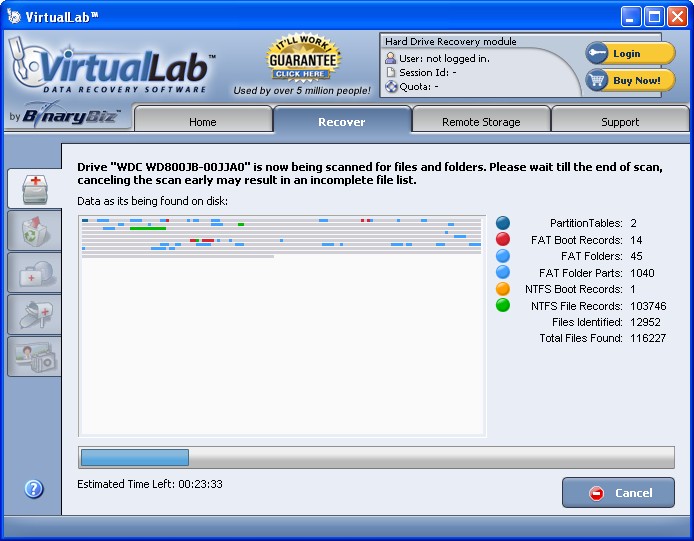
hdrec04scan

To take full advantage of VirtualLab’s wondrous abilities, you must wait until the disk has been fully scanned. However, if you simply do not have time to wait for a lengthy scan, you can click the “Cancel” button on the main toolbar:
You will be prompted with this dialog window:
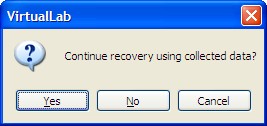
clip0056
If your answer is “Yes”, the recovery process will continue, but only for the data that was scanned before you stopped the process.
If your answer is “No”, you will be taken back to selecting the drive to recover.
If your answer is “Cancel”, the recovery process will continue just from the location where it was stopped.

This partial recovery may gave you an idea of how much success
VirtualLab will have in recovering all of your lost data.

exclJust be sure to perform a full scan later when you do have the time.

Next step is Selecting recognized partitions

0

0

Back To Top

Deleted File Recovery

This module works only with deleted files and allow to “undelete” them (another popular term is “unerase”).
Intact file system is important for this module. If you know that there is something wrong with your file system (for example, you did not delete some folder/files but you cannot access them) or you see something strange with Windows, you should use “Hard Drive Recovery” module.

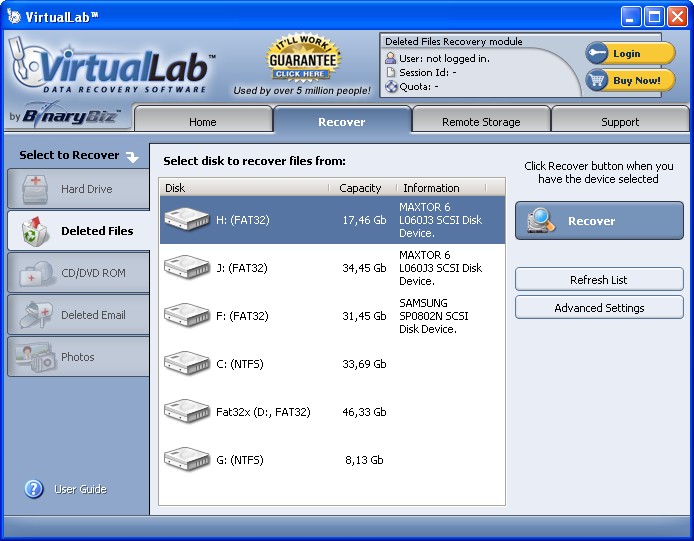
First of all, you see list of all logical volumes found on Host Computer:
und01vol
Choose one of them and press the “Recover” button (if you are familiar with file system details, you can change “Advansed Settings” before pressing the “Recover” button).

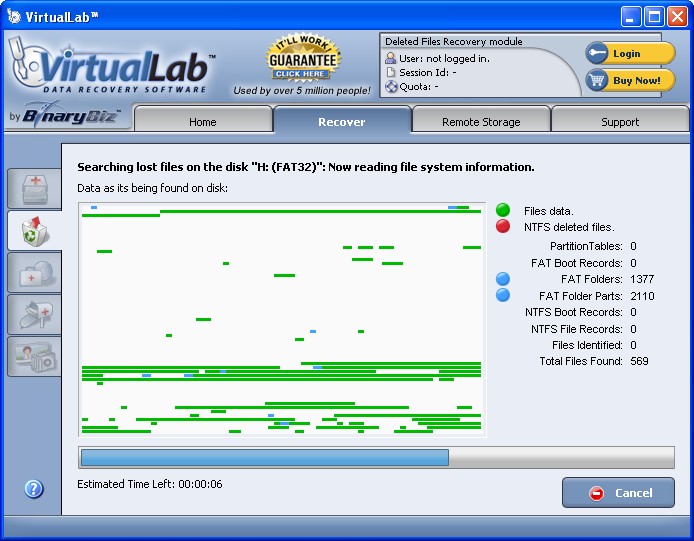
VirtualLab will read file system on selected volume:
und02pass1

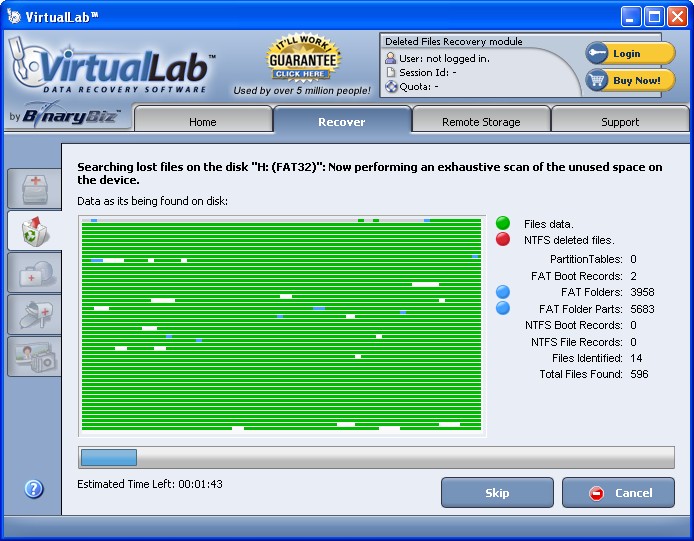
After a few second, VirtualLab will scan empty (unused) disk space:
und03pass2

This step can take some time depending on size of unused disk space. You have to wait until this scanning is finished,
otherwise VirtualLab may not be able to find and recover deleted files.
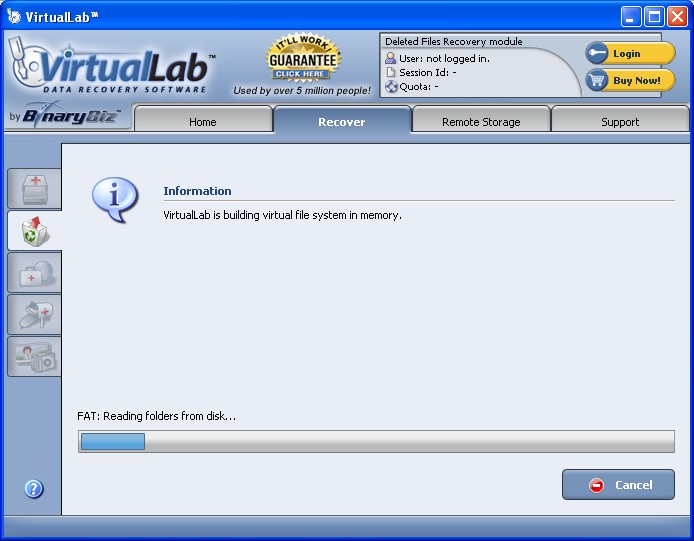
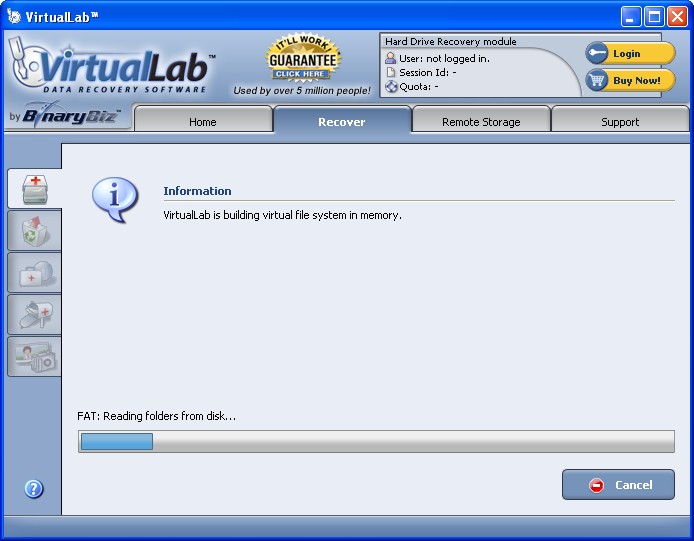
After this scanning is finished, you’ll see some progress bars – VirtualLab is building file system in memory:
und04virtual

And, finally, you see file/folder tree.
und05tree

Go to “Working with found data” section of this guide for further steps.

0

0

Back To Top

CD/DVD Recovery

CD/DVD Recovery module is not available at this moment.
Documentation will be published when this module will be released.

0

0

Back To Top

Deleted Email Recovery

Deleted Email Recovery module is not available at this moment.
Documentation will be published when this module will be released.

0

0

Back To Top

Photo Recovery

Photo Recovery module is not available at this moment.
Documentation will be published when this module will be released.

0

0

Back To Top

Advanced Settings

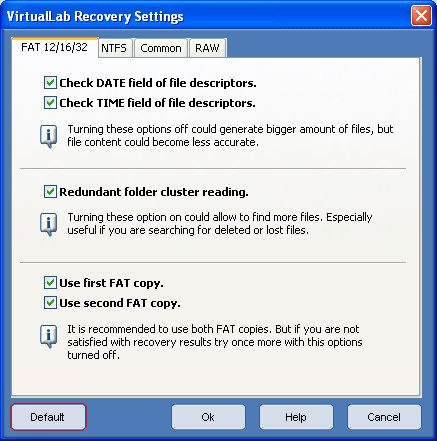
If your device is in a FAT format, then changing the FAT options may yield better quality data than using the default settings.
There are several FAT-specific options:
1. DATE and TIME fields.
VirtualLab checks if these fields contain valid values, and if values do not fit proper range, corresponding objects (files and folders) will be treated as less probable to be included in the list of all found files and folders.

2. Redundant folder cluster reading.
It defines – will VirtualLab try to find more files in folders by reading extra clusters (outside of folder’s cluster chain), or not.

3. Usage of FAT copies.
You may have to try usage of the first FAT copy (“FAT1”) or second FAT copy (“FAT2”), or maybe even no FAT to get the best quality of data (depending on the nature of the damage to the disk and fragmentation of the files prior to the loss).

clip0030
You can always return to the default options by pressing “Default” button.

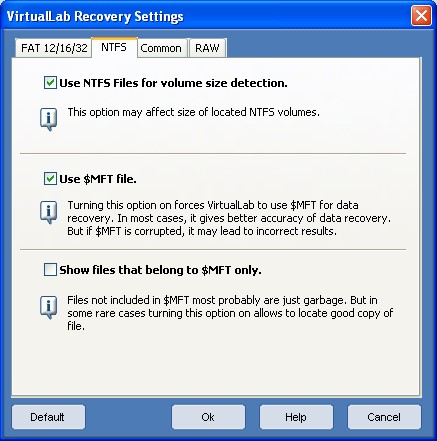
These options are available for NTFS volumes:
clip0031
Change them only if you are not satisfied with results of default settings.

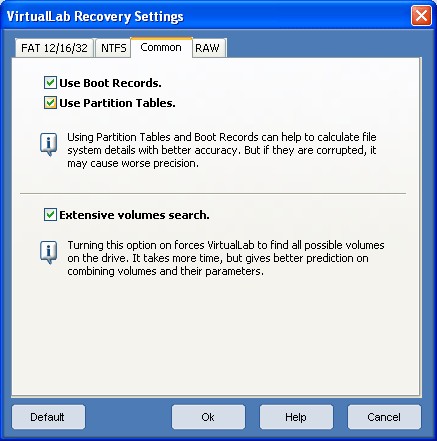
The same for “Common” options:
clip0032

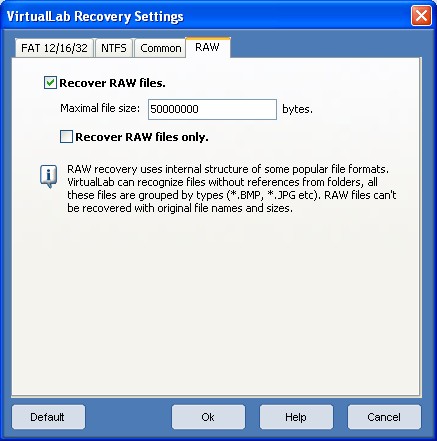
“RAW” options are used for “Raw data recovery”,
when files are detected by their headers taken from sectors of the disk.
clip0033
In some cases, raw data recovery is the only method to recover needed file(s).
Raw recovery cannot recover filenames, but content of the file can be recovered
up to 100%.

0

0

Back To Top

Selecting recognized partitions
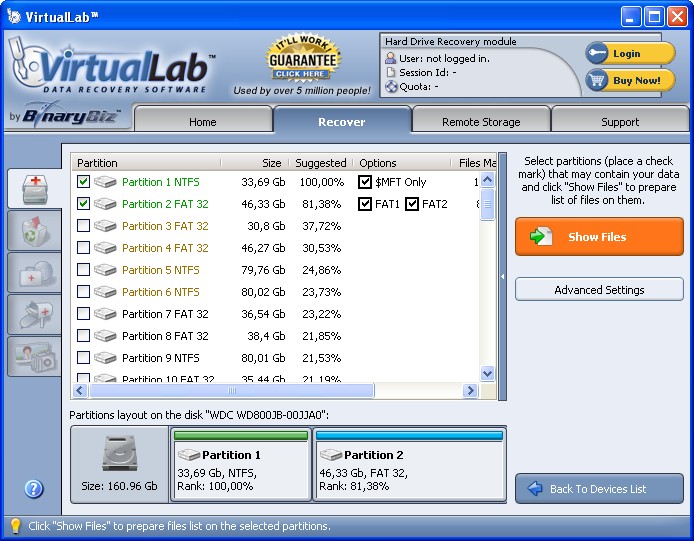
After the disk scan is complete, the VirtualLab workspace will display a list of all found partitions.
For each one listed here, VirtualLab displays a number of statistics, including the partition’s type of file system, a suggested percentage by its data quality, its size in Gbytes and amount of matching files/folders. You may want maximize the VirtualLab application window to fit all details in window without horisontal scrolling.
hdrec06part
In most cases VirtualLab can automatically define most probable partition(s) calculated on information VirtualLab collected from the Bad Device during the scan. You should try this default option at first.

exclIf, however, you are not satisfied with recovered data from this selected by default partition, you can try other partitions too (you can go back to this window from any step using the “Back” button).
Your best bet is to preview the data from many partitions, starting with the default selection. This will give you a good idea of which partition will yield the best results. To make your data recovery as easy as possible, we have tried to make VirtualLab as intuitive as possible, but you may need to get involved and look at the data from more partitions.

if you are familiar with file system details, you can change “Advansed Settings” before pressing the “Recover” button

Now, press the “Show files” button. You’ll see some progress bars while VirtualLab is building file system in memory:
hdrec07virtual

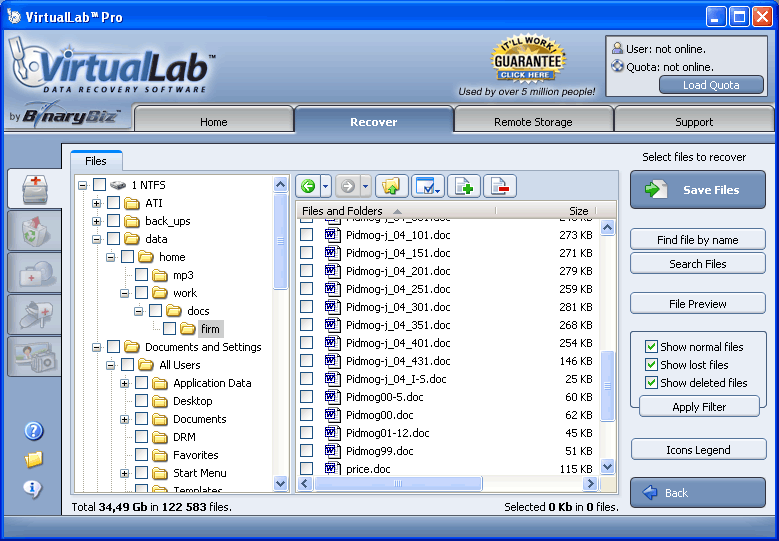
And, finally, you see file/folder tree.
folder-tree

Go to “Working with found data” section of this guide for further steps.

0

0

Back To Top

Working with found data

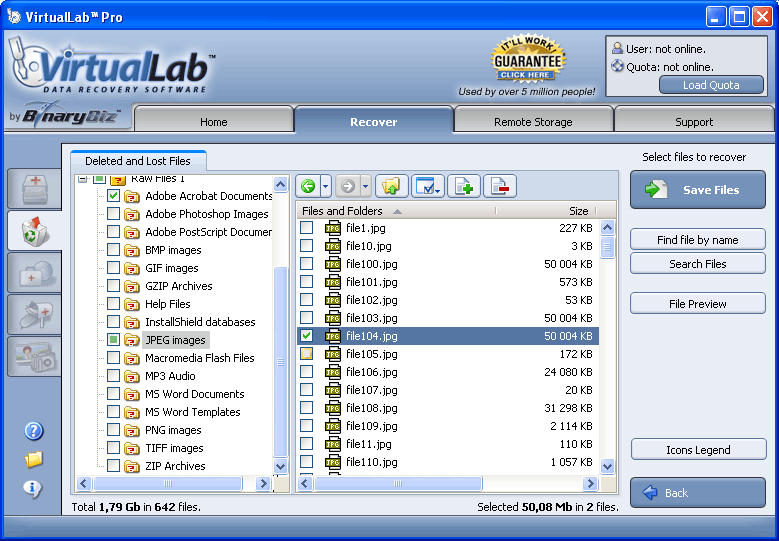
Work with VirtualLab’s file/folder tree is simple – you can walk thru the tree, check subfolders and preview content of files.
Main goal here is to select all files and folders you want to recover.
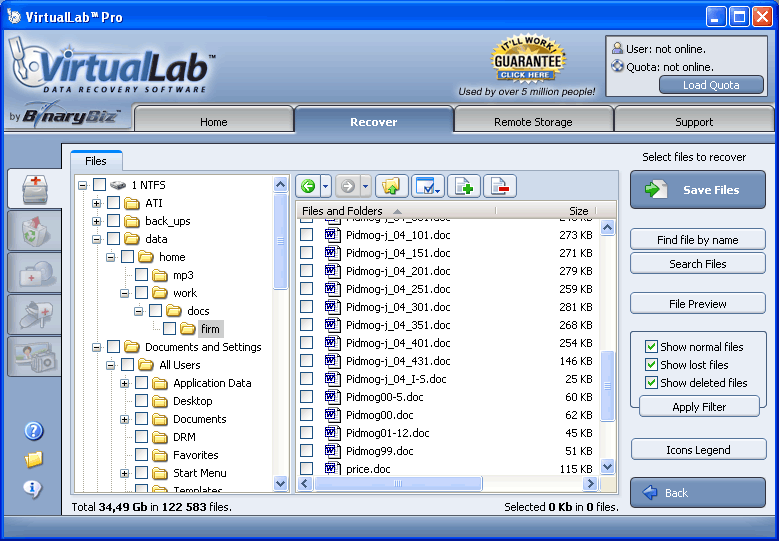
folder-tree (1)

Press the “Icons Legend” button to see meanings of icons and colors.

Maximize the VirtualLab application window now, in order to see more details on files and folders you are going to recover.

There are 2 important folders in recovered virtual file system – “Lost folders” and “Raw Files”. Be sure to check both of them,
sometimes recovered files can be placed here.

You can walk thru folder tree in the left pane, seeing subfolders and files in the right pane, with the name, size, files count, date and time.
Open folder trees by clicking the plus signs to the left of folder names in the left pane.
Select a folder in the left pane, and its content will be shown in the right pane.
All columns in the right pane are resizeable (use your mouse on header of columns area).
Headers of columns are clickable, you can change sorting order for the list of files by clicking header of the column.
There is a small toolbar in the top of the right pane:
1st and 2nd buttons (“go back”/”go forward”) allows you to navigate with “history” of seen folders;
3rd button allows to move to the parent folder (available if there is a parent folder for selected object);
4th button allows to choose which columns will be displayed;
5th and 6th buttons allow to select/deselect all objects in current subfolder.

You can search for files and set filters with buttons on the right side of the VirtualLab application window.
Do not miss “File Preview” button, it launches the File Viewer window (available if you’ve selected a file);

To check the quality of the data in the container, highlight a text file (with an extension of .txt) or an image file (with an extension of .bmp, .gif or .jpg) by clicking it, and then click “File Viewer” button (or press “Enter”). The contents of the highlighted file should display in the File Viewer. If you are able to view the contents of several text or image files, then it’s safe to say that container files of other types were also recovered successfully.

After checking content of folder tree and some files in File Viewer,
you have to buy quota to save (recover) all selected folders/files.
Press the “Buy Now” button in top right cornet and follow instructions.

After you’ve bought it, you’ll see Available Quota in Gb in the top right corner of window.

Now, you have to Sign In

0

0

Back To Top

The File Viewer

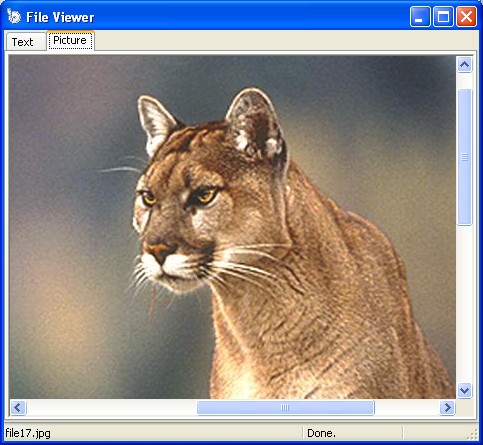
If you’ve selected a graphic file (.bmp, .gif or .jpg), File Viewer can display it as a picture.
Trial Evaluation session will allow you to see only half of the picture, paid users see full picture.
clip0028

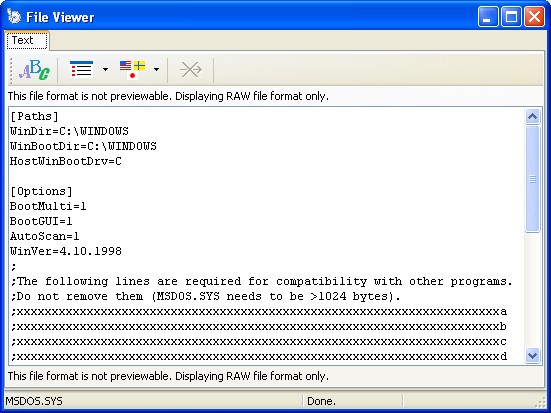
You can see content of plain text files also:
clip0037

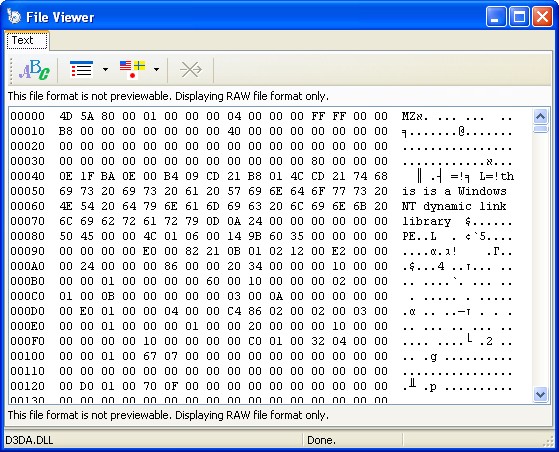
exclNote: The File Viewer can show only plain text files and simple graphics in a format that looks normal to you. If you select a format that cannot be translated properly, then you will see the file in ‘HEX’ mode, meaning you are seeing the hexadecimal view of the file. If you are not familiar with this format, then you should not preview files other than text files and graphic files. ‘HEX’ mode is for advanced users. Additionally, you may also request 1GB Free which is free quota that you can use to also determine the quality of the found data.

clip0036
Small toolbar on the File Viewer allows you to choose font, mode (hex, text, formatted text) and codepage for displaying file content.

0

0

Back To Top

Signing In for Paid Session

Now you see this window on the screen:
login

Fill e-mail and password fields and press “Sign In…” button.

You can turn off the “Save Login” checkbox if you do not want your account details stored on the computer. But you will be prompted to input e-mail/password every time you run VirtualLab.

If you do not remember your password, click on the “Forgot your password?” link,
input your e-mail address in appeared window, press “Submit” button and check your mailbox.

If you work from behind the firewall, check your Network Settings by pressing
corresponding button or ask your network administrator to help you with proper
network parameters.

After you have signed in, you can start saving recovered files

0

0

Back To Top

Network Settings

If you have problems connecting to VirtualLab Server, you may need to modify the default network options:
network

Here are some pointers on modifying these settings:

  • Try connecting via a proxy server by selecting Use Proxy Server. If you do not know what kind of SOCKS protocol is used in your firewall, or if you are just unsure how to use these options, ask your network administrator for help. Please do not ask us for proxy assistance.
  • Click Default Values if you want to restore your network options to their default values.
  • Click OK to save your changes.

0

0

Back To Top

Saving Recovered Files

After you have previewed files in the recovered file system and determined that the data is in good shape, after you have signed in, you’re almost ready to save the files you wish to keep.

1. Make sure that all files you wish to recover are selected. Selected files have checks in their checkboxes.

2. Click the “Save Files” button. You’ll see a progress bar indicating that VirtualLab Client is waiting for data from VirtualLab Server. This may take a few moments. Then you will be asked to select a location in which to save the recovered files.

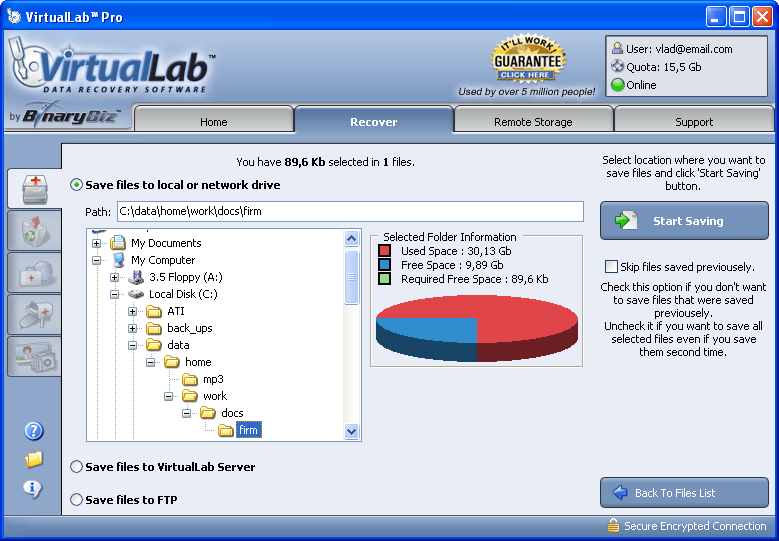
3. Using the Host Computer file tree on the left side of the screen, navigate to the Good Device. If the Good Device is properly connected to the Host Computer, the Good Device should appear in this file tree. If you are using the Host Computer as the Good Device, simply select a folder on the Host Computer in which to save the data.

4. Take a look at the pie chart. This neat feature tells you how much space is available in the save location you have chosen. The Free Space indicator tells you how much space is in the folder, and the Required Space indicator tells you how much space you need in order to save all recovered data.
saving

5. If you need to add a folder to the file tree, select the existing folder in which you want to create the new folder and click the Create Folder icon. You will be prompted for a folder name. Type a name and click OK. The new folder will appear in the file tree.

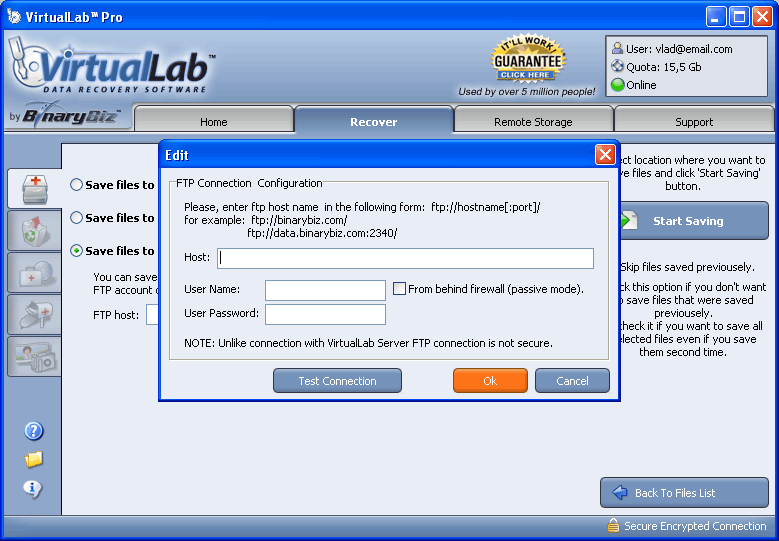
6. You also have the option to save your recovered data to VirtualLab Server or to FTP server. FTP stands for “file-transfer protocol,” is simply a method of transferring data from one location to another, usually over the Internet. You can find tons of information about FTP by searching the Web. You need an FTP account in order to use this feature.
saving2ftp

If you do not have an FTP account, and do not have enough free space on Good Device, try to save files to VirtualLab Server.
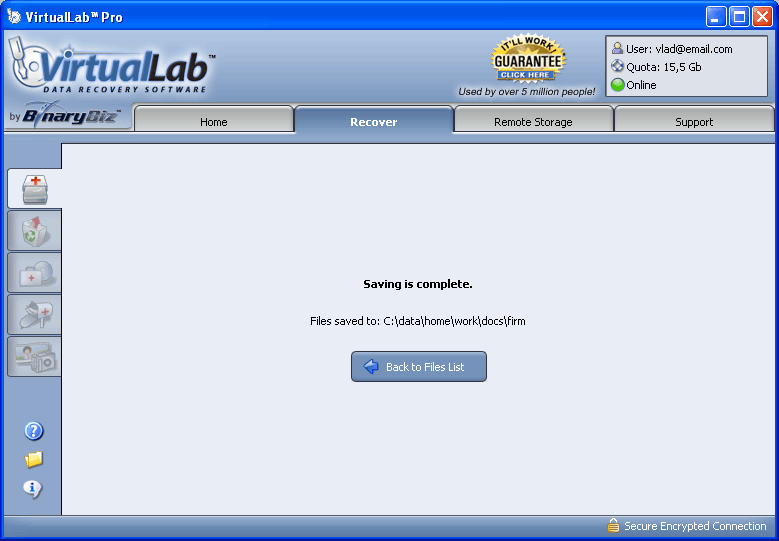
After you have choosed an option for saving files, press the “Start Saving” button and your data will be saved.

saving_complete

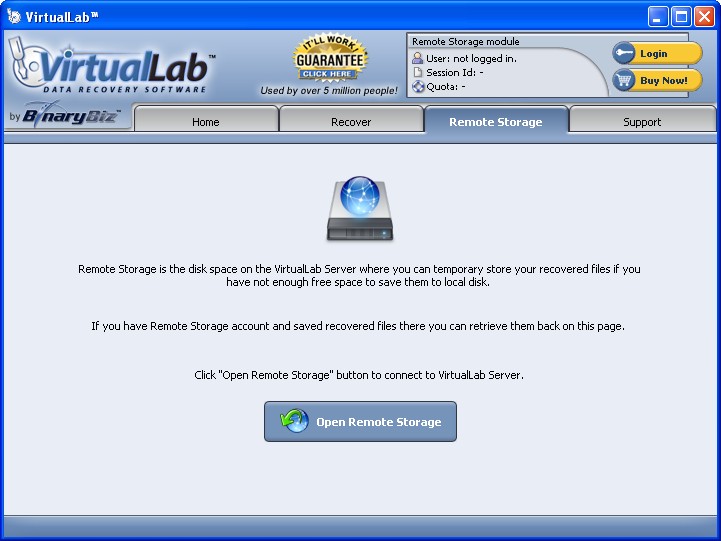
If you’ve choosen saving to VirtualLab Server, you should use “Remote Storage” tab when you launch VirtualLab next time:
clip0082
Click the “Open Remote Storage” button and follow appearing instructions to get your files.

0

0

Back To Top

Support

Any time you have problems with VirtualLab, feel free to contact our Support Department.
Just press “Support” tab in top right part of the VirtualLab application window and use our
online support features:

support

0

0

Back To Top

Email Us