- On the Welcome screen, select the reason for using VirtualLab from the list of options if you haven’t already and click Next.
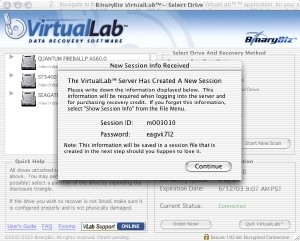
- The select Start a new VirtualLab Recovery and click Next. You’ll see a short series of messages while Virtual Client is attempting to connect. Then your session information will display. Be sure to write down your session ID and password! You can retrieve this information at any time by going to File > Show Session Info.

- Next VirtualLab will tell you it is preparing to create your session file. Navigate to a location in which to save the session file and click Save.
- The VirtualLab workspace displays, and the recovery session is now open.
Next step: Selecting the Bad Device

