Follow these steps to install VirtualLab™ Client on the Host Computer:
1. Make sure the Host Computer meets all of the system requirements and that the Host Computer and Good Device have sufficient memory available, as defined in the pre-installation checklist.
2. If you are upgrading from a previous installation on OS X, uninstall the older version of VirtualLab™ Client first by dragging the application to the trash and emptying the trash.
3. Download VirtualLab™ Client if you have not already done so.
4. Unstuff the VirtualLab™ Client archive with Stuffit or some other file-compression utility.
5. If you have Mac OS 9.x (Classic)
After you unstuff the archive, you’ll see a VirtualLab™ folder on your desktop. You may place this folder anywhere on the Host Computer.Your installation is complete.You can skip the remaining steps. REMEMBER: Don’t place the application on the drive that you are trying to recover (the Bad Device)!
If you have Mac OS X
Cotinue with the remaining steps to complete installation.
6. After you unstuff the archive, you will see a disk image with the extension .img on your desktop. Double-click this file to mount the image.
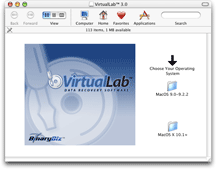
7. Once it is mounted, you’ll see a drive on your desktop similar to the one to the right. Double-click the drive to open it.
8. In the window that appears, double-click the Mac OS X folder.

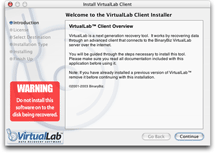
9. Double-click the VirtualLab™ installer file. The Installer launches.
10. OS X requires that you enter your system user name and password. Do so, and then click OK. The Installer Welcome screen displays.

11. Accept the software license agreement when prompted to do so.
12. Select a destination drive on which to install the application. DO NOT INSTALL THE SOFTWARE ON THE BAD DEVICE!
13. Follow the remaining on-screen instructions to complete instructions. You will see a confirmation that VirtualLab™ was successfully installed.
