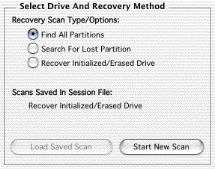
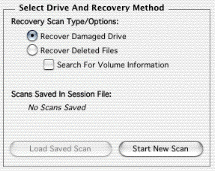
After selecting the drive you wish to recover, you must specify the recovery method you wish to use. Depending on whether you have the actual drive or a partition on the drive selected, you will see one of these two selection boxes. If you already have a scan saved in the session file, it will appear in the list below the scan methods. To load a previously saved session, select the type of scan you wish to load, and click the ‘Load Saved Scan’ button.
Search for Lost Partition
This method searches the selected drive for a single location and locates the catalog tree on that drive. This scan works best on lightly damaged drives that have just recently failed to mount. If the Search for Lost Partition Scan fails to recover your data, use the Recover Initialized/Erased Drive scan.
Recover Initialized/Erased Drive
This method searches the selected drive for catalog tree fragments and deleted partitions, and can also search for files by type.This method may take quite a while to complete.
Recover Damaged Drive
This method locates the catalog tree in the selected partition. This will take a short amount of time to complete. This scan works best on lightly damaged partitions. If the Recover Damaged Drive method fails to recover your data, try selecting the actual drive and select the Find All Partitions of the Recover Initialized/Erased Drive.
Recover Deleted Files
This method searches the unused/erased portion of the selected partition for deleted files. After clicking ‘Start New Scan’ you will be presented with a dialog that will ask you which file types you want to search for. It will also ask how large the largest file you are searching for is.
Search For Volume Information
This option will cause VirtualLab to search within the selected partition for a Volume Information Block (VIB) before starting the scan. When VirtualLab finds a valid VIB, you will be presented with a dialog in which you should verify the information and accept the VIB or continue searching for one.
Enable Low Level Scan
This MacOS 9 only option will cause VirtualLab to perform the scan at a very low level. This is needed if VirtualLab hangs or crashes during a scan. It should not be used unless this occurs as it increases the amount of time it takes to scan the selected partition.
Next step: Scanning the Disk


